The following steps explain how to add a condition column to a decision table.
Note: you can click the Help for this page link at the top of any page to get additional details on each step.
Steps:
- Navigate to the detail page for the policy you want to edit
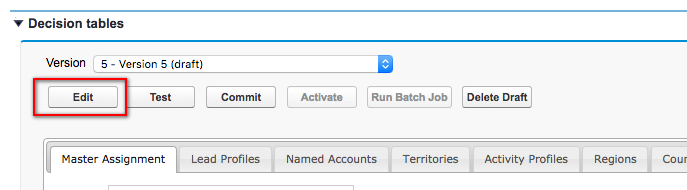
Click Edit to open the policy editor wizard
Click the gear icon at top right of the table to edit the policy configuration
Select the table to which you would like to add the column
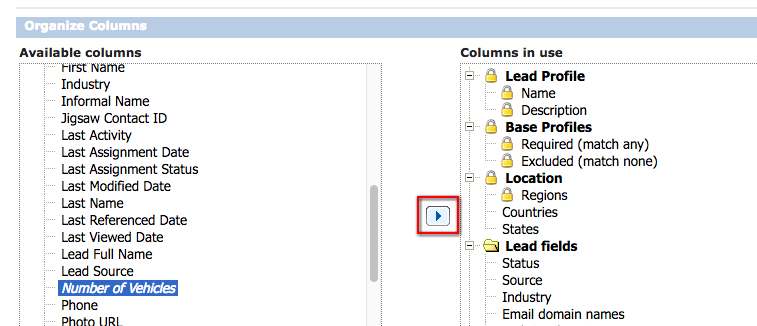
Select a column from the Available columns and click the arrow icon to add it to the Columns in use.
Note that you can virtually use any field (standard or custom).
If the column you are looking to add is on a related record, navigate to the Relations node and find the Fields node under the relevant relation:
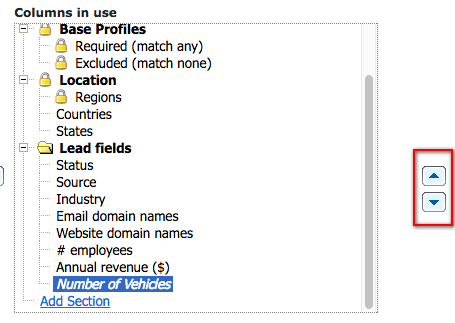
If needed, click Show more relations to load all the lookup relations defined for the parent object. You can also navigate down the hierarchy multiple levels.If necessary, locate the field you just added in the Columns in use section and move it to the desired location using the up or down arrows
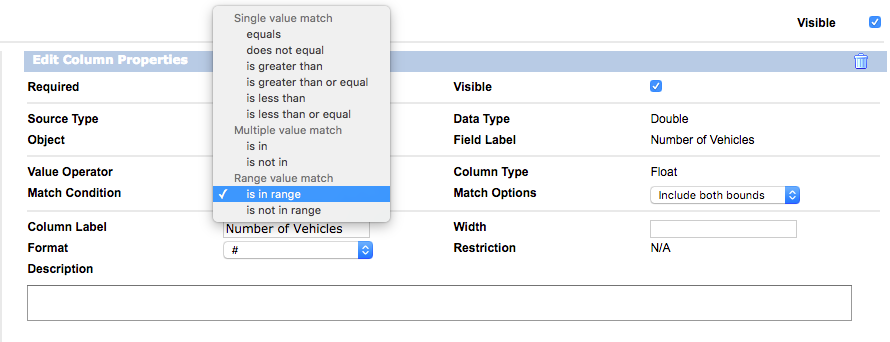
Edit the match condition and other properties as needed
Click Save to save the policy configuration
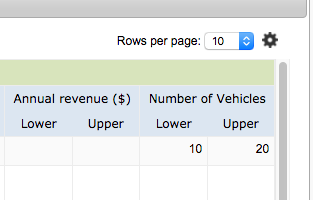
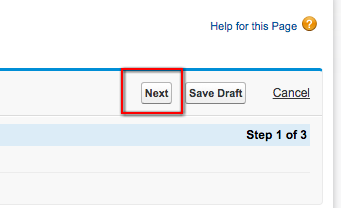
You can now enter values into the new columnWhen you have added values for all applicable rules, click Next to move to the Test Console
Select some sample leads and click Run Test to test your new condition
If the results are as expected, click Next again to proceed to the final page of the wizard
Enter a version label and notes and click one of the following:
Save as Draft: saves your changes but allows you to continue editing them later
Commit: creates a new policy version that is no longer editable, but does not yet change the default active version
Commit and Activate: immediately activates your new rules. Any new records processed by this policy will use the new rules.