The following steps explain how to add an action column to a decision table.
Note: you can click the Help for this page link at the top of any page to get additional details on each step.
Steps:
- Navigate to the detail page for the policy you want to edit
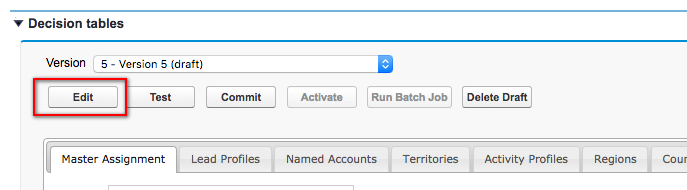
Click Edit to open the policy editor wizard
Select the table to which you would like to add the column
- Click the gear icon at top right of the table to edit the configuration
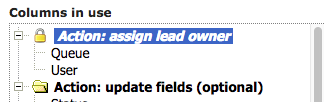
- In the Columns in Use tree, select the action to which you want to add the column
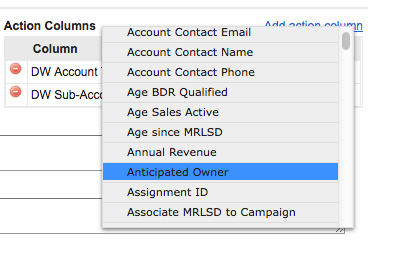
- In the Edit Section Properties pane on the right, click on Add action column and select the column you want to add
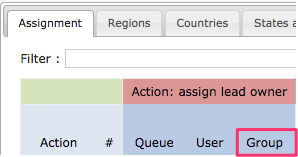
The choices available depend on the action type.- For an Assign Owner action, choices are as follows:
- For an Update Object action, you can choose any available field
- For an Assign Owner action, choices are as follows:


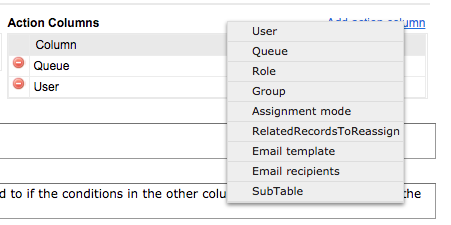
NOTE: if you need to add a parameter not shown the list, choose -- Custom -- at the end of the table
- You should see the new column appear under the selected action in the Columns in Use tree
- To configure a column, select its entry under Columns in Use and modify the name or other parameters
- Repeat if necessary.
- To reorder columns, use the up/down arrows in the Columns in Use tree

- To remove action columns, select the action section in the Columns in Use tree and use the delete icon to remove a column

- When all required columns have been added, click Save
- You should see the new column(s) appear in the table
Enter values into the column if desired
Click Next, and optionally run some tests
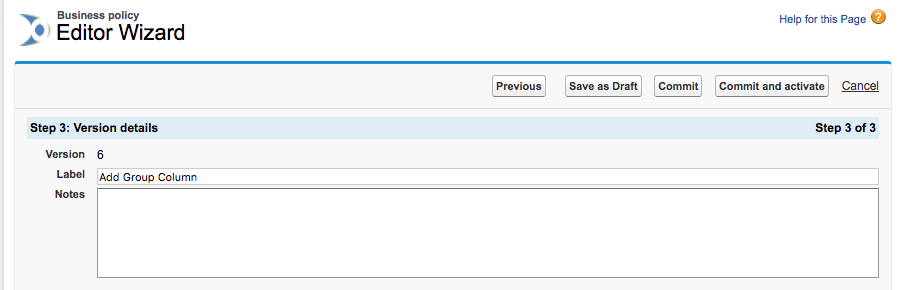
- Click Next, enter a label and notes for the new version, then save it as a draft, commit, or commit and activate